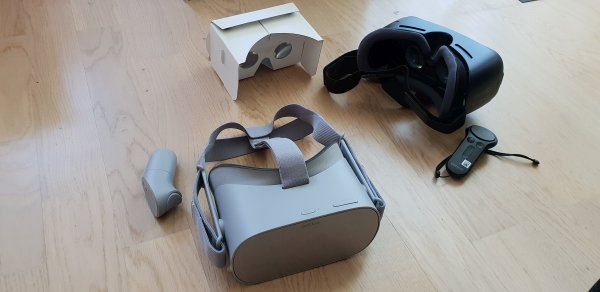
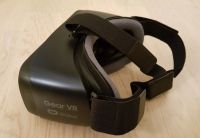
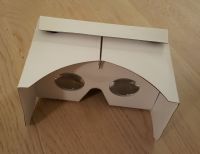
Erst Cardboard und Samsung Gear VR, nun Oculus Go

3 VR-Brillen

Eine logische Erweiterung meiner VR-Tests mit Smartphone (also relativ bezahlbare niederschwellige VR) ist die im Juni 2018 in Deutschland auf den Markt gekommene Oculus Go. Dieses VR-Headset benötigt kein Smartphone (hat einen vergleichbaren Chip integriert, braucht also auch keinen PC) und greift auf die Apps des Oculus Stores zu (https://www.oculus.com/experiences/go/ – weitgehend analog der Samsung Gear VR). Wie bei Smartphone-VR gibt es „nur“ 3DoF, also kein Positional Tracking. Im Lieferumfang enthalten ist ein Hand-Controller, der zum Steuern der Menus und Anwendungen benutzt/benötigt wird. Für das Einrichten der Oculus Go ist allerdings wiederum eine Smartphone-App und ein Facebook-Account oder Oculus-Account nötig. Der Betrieb der Oculus Go erfolgt dann entweder mit W-LAN (keine „Captive Portals“ möglich, bei denen man sich anmelden müsste) oder – nach Download von Inhalten – teils auch offline.

Test einiger kostenloser Oculus Go Apps
Das App-Angebot im Rahmen des Einrichtens enthielt „Dead and Buried“ , was ich schon von der Samsung Gear VR her kannte, mich dennoch wieder überrascht hat bzgl. des hohen Grades an Immersion (vielleicht auch weil der Oculus Go Hand-Controller so gut funktioniert). Ebenfalls sehr immersiv ist die „Epic Roller Coaster“ App, bei der ich allerdings zum allerersten Mal im Rahmen meiner VR-Tests so etwas wie Motion Sickness verspürte – insofern war hier der Spaßfaktor gering. „Guided Meditation VR“ (https://www.oculus.com/experiences/app/929143807179080/) wäre eine schöne Idee, konnte mich aber aufgrund der Optik noch nicht überzeugen, da schaue ich mir lieber die reale Welt an – vielleicht wäre sie aber für den Winter geeignet…?

Aufgrund der immer noch zu geringen Auflösung der Brillen wirken Real World 360-Grad-Filme und 360-Grad-Bilder auch bei der Oculus Go gerastert (Fliegengittereffekt) bzw. Videos ohne Download noch dazu oft ruckelig / verschwommen. Bei „Invasion“ , dem extra für VR erstellten Animationsfilm, ist das eher kein Thema – dieser gefällt mir auch auf der Oculus Go sehr gut (Download über Within App). Interessante Anwendungen innerhalb der Within-Player-App waren für mich „The People’s House – inside the White House with Barack and Michelle Obama“ (läuft 22 min) und das künstlerisch gestaltete „Within Original“ Musikvideo „Hallelujah“ (remastered from 6DoF to Mobile VR – daher leider ohne räumliche Bewegung, die durch die Lichtfeldkamera sonst möglich wäre). Die App „International Space Station Tour“ (https://www.oculus.com/experiences/app/1055629531142378/) bietet großen Detailreichtum und ist für am Thema Interessierte sicherlich eine Bereicherung.
Medizin-Apps gibt es offensichtlich schon jede Menge, ein kostenloses Beispiel ist der Ausschnitt „Skeletal system“ aus der „Human Anatomy VR“ (https://www.oculus.com/experiences/app/1658650407494367/). Dort kann man mittels verschiedener Funktionen sein Wissen testen bzgl. der Benennung von Knochen des menschlichen Körpers. Von der 360-Grad-Umgebung macht diese App anderen Gebrauch als die App „Body VR“ (= Travel through the bloodstream)(https://www.oculus.com/experiences/app/869485659814410/).

Eigene 360 Grad Bilder
Bei Google Cardboard und Samsung Gear VR nutzt man ja das Smartphone und hat somit direkten Zugriff auf die dortigen 360-Grad-Bilder, bei der Oculus Go braucht man das mitgelieferte USB-Kabel: Per Anschluss an einen Windows-PC ließen sich (kurz Oculus aufsetzen und Datenzugriff erlauben) meine mit der Kamera „Samsung Gear 360“ erstellten 360-Grad-Bilder im Windows Explorer auf die Oculus Go (Ordner Pictures) kopieren. Die meisten wurden sofort als 360 Grad erkannt und gekennzeichnet, einige „leisteten aber etwas Widerstand“ und ich musste das Format selbst setzen.
Innerhalb der Anwendungen der Oculus Go erstellte Screenshots kann man übrigens bei Datenzugriff aus dem Verzeichnis oculus/Screenshots auf seinen PC kopieren.

Neuer Webbrowser in VR
Getestet habe ich auch „Firefox Reality“ , die gerade erst erschienene  Version 1.0 von Mozillas Browser für VR-Headsets: Mit Hand-Controller war das Eingeben von URLs kein Problem, die Spracheingabe war etwas gewöhnungsbedürftig: heise.de musste ich buchstabieren, die Tagesschau hingegen wurde sofort erkannt. Erstaunlich gut ist die Optik, denn normalerweise vertragen sich VR-Brillen und Text (auf Webseiten ein Kernelement) nicht besonders gut. Das Konzept, die dargestellte Webseite in verschiedenen Formaten anzuzeigen (Vergrößerung 0.5, 1.0. 2.0 etc. zusätzlich zum Vergrößern des Browser-Fensters mittels Hand-Controller) funktionierte gut. Die 100-Sekunden-Tagesschau war mit Oculus Go in guter Bild- und Tonqualität, was ich so nicht erwartet hätte. Dennoch würde ich mir keine längere Suche antun, was aber weniger mit Firefox Reality als mit der – wie ich finde – sehr unbequem zu tragenden Oculus Go zusammenhängt.
Entdeckt habe ich durch die Startseite von „Firefox Reality“ das Format „PanoMoments“: weder Foto noch Video, eher VR time Loop, und muss man tatsächlich mal gesehen haben, um es zu verstehen…
Einen Bericht zu Firefox Reality liefert heise: https://www.heise.de/newsticker/meldung/VR-Browser-Mozilla-veroeffentlicht-Firefox-Reality-1-0-4167174.html
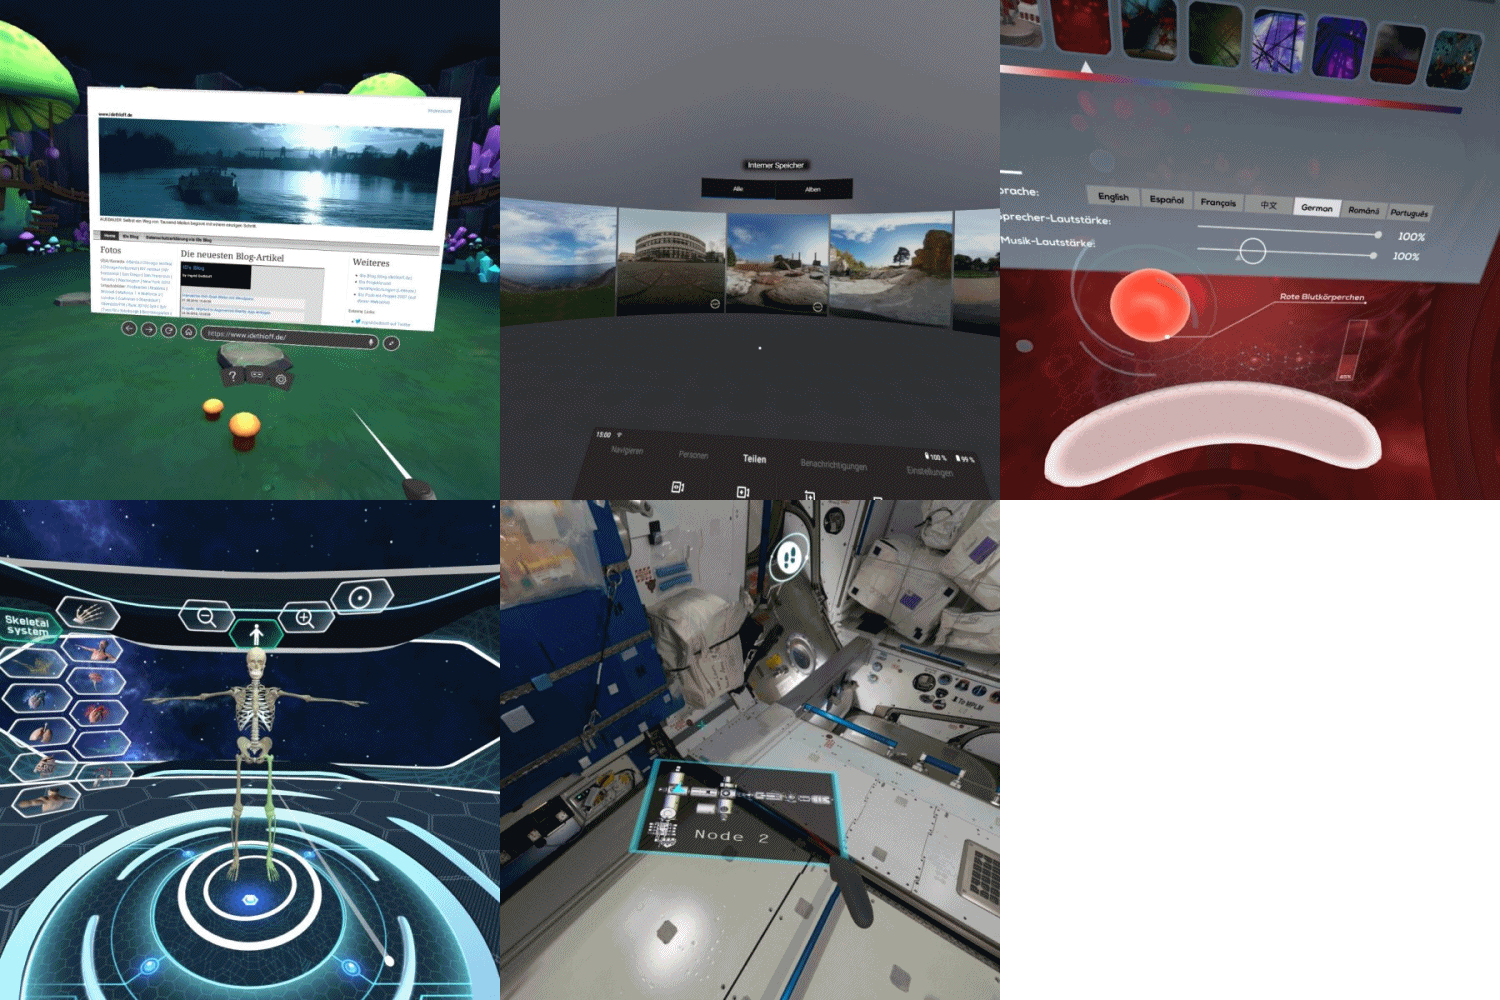
Oculus Go ScreenshotsScreenshots aus Firefox Reality, Oculus Gallery, Body VR, Human Anatomy VR, ISS Tour

Mein Fazit im Vergleich mit Cardboard und Samsung Gear VR

Das Headset Oculus Go liefert die beste Bild-, Ton- und Navigations-Qualität – ist aber leider sehr unbequem und hat bei Betrieb bei mir immer noch einen chemischen Geruch. Die Version mit 32GB kostet 219 Euro und ist damit deutlich günstiger als die High-End-VR-Brillen Oculus Rift und htc Vive, die zusätzlich einen starken PC benötigen.

Einige Vorteile

  • einfache Installation
  • alles integriert, kein Zusammenbauen nötig vor Benutzen
  • gute Bildqualität
  • integrierter guter Ton, der auch Raumklang bietet
  • sehr gut funktionierender Hand-Controller
  • App-Paket mit kostenlosen Apps gleich beim Einrichten angeboten
  • alleinige Funktion als VR-Brille, daher keine störenden Smartphone-Features

Einige Nachteile

  • sehr schwer (im Vergleich  zu Cardboard und Samsung Gear VR)
  • kein Drehregler wie bei Samsung zum Scharfstellen, daher Scharfstellen über Verschieben der Position der Brille auf den Wangenknochen, was für unbequeme Haltung sorgt
  • unangenehmer Geruch

Making of … IDs VR App

Making of – A Virtual Reality App on Android for Google Cardboard with Unity 3D

Motivation
I’ve been interested in Mobile VR (that means low-cost VR without an expensive VR headset and without a high-end gaming PC) for some time. Last year, I took the UC San Diego edX course “How Virtual Reality works” and learned a lot in theory and by testing and reflecting about Google Cardboard apps during the weekly assignments. I thought, it would be absolutely fascinating to create something that really works on my Android smartphone and relates to the aspects we got into in theory last year, so I also took this years edX course “Creating Virtual Reality (VR) Apps” (CSE190x). I wanted to see how difficult it is and if it can be done without massive programming skills.

The result
Logo IDs VR AppThanks to the edX UC San Diego course “Creating Virtual Reality (VR) Apps” there is an app, which actually works … This is Build 1.16 (March 22nd, 2018). With Google Cardboard, you don’t have (hand) controllers and therefore interaction happens by gaze and one button. Nevertheless, I’m quite impressed what can be done.
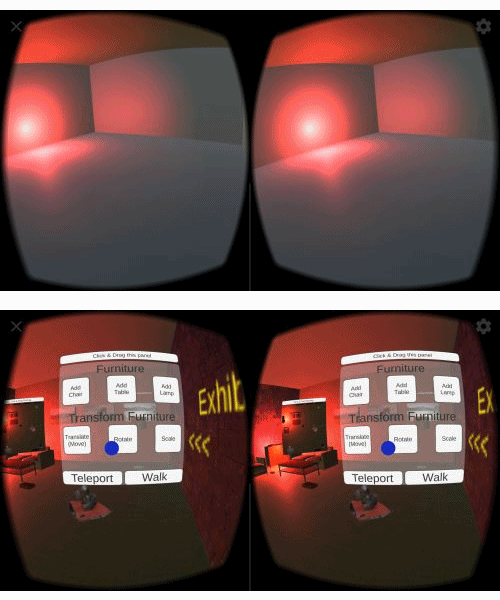
If you actually want to create an app, I warmly recommend this 6-week-course which is part three of a “Professional Certificate Program”.

If you would like to try IDs VR App on your Android Smartphone at your own risk, here is the download link: https://www.idethloff.de/IDsVRapp/Build16_test.apk

How it began
You need a current Android smartphone, a Google Cardboard and a PC on which runs Unity 3D (https://unity3d.com/de) – there is a personal free edition “For beginners, students and hobbyists who want to explore and get started with Unity.” Btw, Unity 3D is one of three well-known VR authoring tools, the other ones are Lumberyard and Unreal Engine.
In order to test at any one time what you’ve created in Unity 3D, you need to connect the smartphone with the PC and allow some configuration options as “developer”.
It was a little bit tricky to install and configure the necessary Unity 3D environment and its many components: GoogleVRForUnity, Android SDK and JDK. Installing Android SDK (now via „Android Studio“ and afterwards the SDK component) was awful because it took a long long time and when I tried „Build and Run“ in Unity, I just got the error message „CommandInvokationFailure: Unable to list target platforms“ – Using the older version of JDK didn’t help either – at least until I deinstalled the Java 9 SDK. „Build and Run“ then led to numerous other error messages during which I had to change the player settings in Unity (Minimal API level, Package name) and had to change settings on my smartphone which I had to connect via USB during the process (enabling developer options). It was a very nice moment, when I saw the Unity icon in the Cardboard app on my smartphone and could see what I had created in Unity (which was just a room with four walls and a red point light)!

This animated gif shows the difference between week 1 (kind of „Hello World“-moment) and week 6 (finished Test-App):

Animated Gif showing the difference between week 1 and week 6

Week 1 – Game Objects, Camera and Lighting
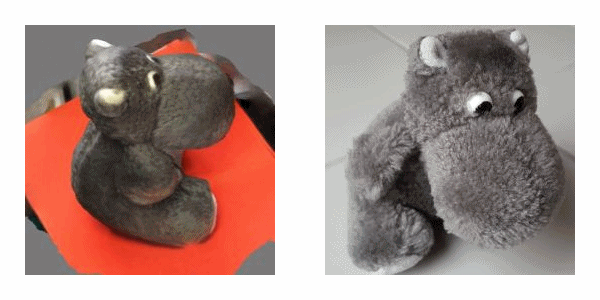
Game Objects / Scenery: You want to have some content in your app and there are a few possibilities for obtaining/placing 3D models: You can create them directly in Unity 3D or you can fetch them from the Unity Asset Store (there are many free ones) or you can import them, after you’ve created them in another application (e.g. 3D modeling tool). You have to think about reducing the complexity of the objects (polygons in the objects and pixels in the textures) so that the smartphone can keep up with its rendering power (which is much lower than that of a gaming PC). My app became bigger in size each week and the first thing, which blew up its size was a real-world-object which I scanned with the iPad TRNIO app (result shown on TRNIO web page) and afterwards converted in order to get a format which worked in Unity. Luckily, there is a statistics option in Unity, where you can see in Play Mode if you still get the recommended rate of at least 60fps.
This animated gif shows a picture of the original and of the 3D scan result of my hippo (in the app you can walk around it):
Animated Gif showing photo of hipp in real world and hippo as 3D scan

Lighting: You’ve got 4 light types in Unity: Ambient Light, Directional Light, Point Light, Spot Light – all these are things which you can do in Unity directly via the menus and it’s quite easy to add light sources like spotlight or point light and change color, range, intensity.
Camera: Depending on what’s in your VR world, when you want motion on your screen, you can either move the Unity virtual camera or move the world.

Week 2 – Gaze interaction
Actually, it isn’t gaze interaction, but sensors in the smartphone detect the movement of the head and act accordingly. Triggering an action with the “gaze cursor” (which was drawn in the center of the user’s view) can either be done by button on the headset (we did that in our app) or by the “stare and wait” method (which would be installed as a circle which fills out within a few seconds if you hold the gaze).
That was the moment when our scripting started: During the course we wrote 9 C#-scripts from scratch. I would have been totally lost, if there hadn’t been two enthusiastic course assistants who had pre-recorded a lot of video tutorials and showed step-by-step what had to be done.

Week 3/4/5/6 – UI and locomotion, selection and manipulation of objects, wayfinding, textures, spatial audio
Week 3/4/5/6 were a lot about menus in 3D, moving in 3D and how to avoid motion sickness (because in VR, “what you see is not what you get”). Our menu was installed as a UI with buttons, which were combined with scripts in order to make something happen. This meant: Making objects gazeable/transformable, instantiating prefab game objects like furniture by looking at the floor and moving around in the 3D world. Locomotion was technically realized as teleporting (e.g. moving from one spot in the 3D world to another spot instantly – a little bit of magic) and as walking. As we had constructed a room with 4 walls, the walking had to be limited by script but it was a nice touch to allow a view through the walls (That’s why the skybox-feature with a 360 photo made sense). Teleportation avoids motion sickness but can also be a bit disorienting. Therefore, later on, we added a minimap of our room by adding an additional camera with projecting its view as texture on a second UI. It’s quite interesting to see the minimap updating automatically when objects are added or the user (which is represented as a sphere) moves through the room. It was important to make the minimap UI and the other UI user-centered and draggable in order to keep them useful when moving around in the room. For the implementation of these features we needed a lot of new scripts … In comparison, it was very easy to decorate a little bit by giving new textures to the game objects – it was nice to use own photos, import them into Unity and just drop them onto the chosen objects in the scene view – however, what I did wasn’t ideal because the size of the app increased a lot … It was also very relaxing to add spatial audio (e.g. a radio game object and a sound file combined with some configurations in Unity) in order to get more realism: You need a headset with your smartphone to identify if the sound comes from the left or right, but it’s very impressive. We also covered the topic “pitfalls to avoid” (among them “creating a VR app that doesn’t actually require VR”, “making (wrong) assumptions about users” or technical problems like “visual lag”) and the necessity of usability testing (test for functionality & test for comfort) as well as user training. One way of user training would be a demo video and I opted for a screen recording while using the cardboard instead of recording during the Game View Play mode in Unity on my PC.

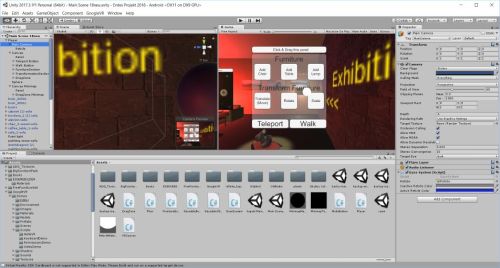
This picture shows my project in the Unity 3D interface:
Unity 3D Oberfläche
A lot of testing happened in Unity itself with the mouse moving around for simulating head movement:

My conclusion
Yes, it was possible to create a VR app which is working (mostly, there are some bugs), but I couldn’t have done it without the before-mentioned video tutorials of CSE190x. It was fun, it was hard work and I appreciate the work of the MOOC team of Prof. Schulze, UC San Diego. The course was very good in discussing and showing step-by-step the realization of important concepts in Mobile VR.
(My verified CSE190x course certificate)
Creating a specific VR app just isn’t possible without programming skills although Unity 3D already does a lot of good work. However, in my opinion, it would be difficult to implement new things just by searching in Unity 3D web pages or forum entries – at least, this is where I failed, when I looked around a little bit for additional features.

Didactical implications for Mobile VR
It would be “comparatively easy” to implement a scenery where students could explore their surroundings and experience a (hopefully immersive) 3D world. However, you would have to create convincing 3D models of the chosen topic and implement interactions so it doesn’t get boring. I am still surprised/impressed what you can do just with gaze interaction: adding prefab objects and transforming them offers a wide range of possibilities and not just a kind of “interior design app”. Gaze interaction isn’t as intuitive as hand controllers would be, but it can be learned fast (even without the help of a demo video or a tutorial). Good to know: Using text in 3D isn’t a good idea, because you can’t really read it, e.g. you have to do without it and maybe instead use sound for information/instructional purposes. Unfortunately, I’ve seen many VR apps where you have a considerable lag and see pixels – there’s no benefit in those apps, where either the loading via Internet or just the smartphone are too slow. It will be interesting to see the progress in technical development – maybe creating VR apps someday will be as easy as creating a homepage – who still remembers writing html code? Most teachers are lost, when I tell them about the “switch to html”-icon in the Moodle text editor.
And who could write and understand C# scripts which are necessary for creating VR apps with Unity 3D? Therefore, creating VR apps which exceed showing a 3D world fitted with very simple objects and where you can move around a little bit, at present, will become very expensive in production. And still, you couldn’t compete with the perfect graphics & range of interactions in games on Sony PS4 etc. … Last but not least: “Don’t create a VR app that doesn’t actually require VR”.
Nevertheless, I’d recommend that you look at some existing VR apps and be impressed and enjoy the journey. It’s an intriguing experience, especially if you see it for the first time.


3D Scan per iPad?

Meine Frage/Idee anlässlich meiner Unity 3D-Aktivitäten war, ob es eine einfache Möglichkeit zum 3D Scan per iOS-App gibt: Fündig geworden bin ich hinsichtlich der kostenpflichtigen iPhone-App Trnio (1,09 Euro), die von der Seite https://3dscanexpert.com/3-free-3d-scanning-apps/ empfohlen wurde.

Es war nicht ganz einfach, mit dem iPad mein gewünschtes Objekt, d.h. ein kleines Stofftier-Nilpferd, zu umkreisen. Das Objekt zu drehen und dabei aus der gleichen Position Fotos zu machen, war leider technisch nicht vorgesehen. Nach einigen Versuchen kam ein Ergebnis zustande, mit dem ich recht zufrieden bin und das gerade wegen der Fehler, u.a. bei der Unterlage, etwas künstlerisch wirkt… Das Ganze konnte ohne vorherige Anmeldung bei Trnio erfolgen; die Bilder sind allerdings automatisch auf den dortigen Server geladen worden, wo auch das Modell aus den Einzelbildern errechnet wurde. Das dauerte einige Zeit und daher habe ich auf Nachbearbeitung verzichtet. Bzgl. Exportieren habe ich aus der App heraus die High-Resolution-Variante gewählt und das Format PLY; den temporären Download-Link konnte man sich zumailen lassen. Automatisch gab es auch einen Link zur öffentlichen Webseite mit meinem 3D-Scan: http://trn.io/2/2G70hcJJJU/

Die Weiterverwendung des 3D Scans in Unity 3D erforderte einen Konvertierungs-Zwischenschritt, und zwar über MeshLab, weil in Unity 3D das Format *.ply nicht verwendet werden kann. Am vielversprechendsten erschien mir hierbei das Format Collada (*.dae) mit nachträglicher Integrierung der jpg-Texture-Datei.


Erste Versuche mit Samsung-Smartphone und Kamera „Samsung Gear 360“

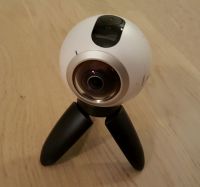
Samsung Gear 360Wesentlich einfacher als mit der „Street View“-App (vgl. Artikel vom 11.6.17) lassen sich 360°-Bilder natürlich mit einer extra dafür entwickelten Kamera erstellen: Die erste „Samsung Gear 360“ ist inzwischen deutlich im Preis gefallen, d.h. liegt bei unter 100 Euro, und in Verbindung mit Samsung-Smartphone S6 und Samsung GEAR VR-Brille passt alles fließend zusammen.
Für die Kamerasteuerung wird die App „Gear 360“ benötigt, für das Anschauen über die Samsung VR-Brille die App „Samsung Gallery“. Alternativ kann man die Fotofunktion auch direkt über die Kamera auslösen und die Bilder dann am PC mit der mitgelieferten Software „Gear 360 Action Director“ bearbeiten – insbesondere relevant wenn man kein Samsung-Smartphone hat…

App Samsung Gear 360App Samsung Gallery


Aspekt 1 – Bei 360°-Fotos ist man immer selbst mit auf dem Bild

Hier gäbe es 3 Möglichkeiten, dies zu vermeiden:
a) Durch den Timer und Auslösen über die spezielle „Gear 360“-App ist man sowieso etwas von der Kamera entfernt oder man „versteckt sich“
b) Man retuschiert sich anschließend aus dem Bild heraus (Photofiltre o.ä.)
c) Man macht kurz hintereinander 2 Bilder und wechselt dabei die eigene Position, d.h. die Objektiv-Seite, um anschließend per Bildbearbeitung die 2 Bilder miteinander zu „mischen“ (also nur die Seiten verwenden, wo man selbst nicht drauf ist)

Aspekt 2 – Wie kann man sich die 360°-Fotos ansehen?

Beim Speichern der Fotos auf dem Samsung-Smartphone wird bereits automatisch das 360°-Format erzeugt, doch eine komfortable Ergebnis-Anzeige gibt es m.E. nicht. Also danach entweder zur VR-Brille greifen oder die JPG-Bilder exportieren.

Samsung Gear VRGoogle Cardboard

a) Samsung Gear VR-Brille: Auf dem Samsung-Handy gibt es dafür eine gesonderte App „Samsung Gallery“, die dann die Bilder in der Samsung Gear VR-Brille sehr gut anzeigt.
b) Google Cardboard-Brille: Die Bilder auf dem Handy umbenennen, so dass sie vorne „PANO_“ heißen, denn dann werden sie von der Google-Cardboard-App  unter „Cardboard-Demos / Photospehre“ automatisch gefunden.
Übigens: Wenn man die Bilder auf dem Handy in der „Street View“-App importiert (über „360°-Fotos importieren“), werden sie dabei automatisch nach „Pictures/panoramas“ kopiert, umbenannt in „PANO_“ und würden somit von der Google Cardboard-App gefunden.
c) Windows-PC: Leider kann der m.E. sonst perfekte Viewer IrfanView 360°-Bilder nicht richtig anzeigen, daher bin ich auf Suche gegangen und habe dabei die kostenlosen Programme „FSP Viewer“ und „Nero 360 VR“ gefunden.
d) Beispiel 1 und Beispiel 2: Freigeben der Bilder nach Google Maps aus der „Street View“-App, denn dann erhält man einerseits eine URL und andererseits den Code zum Einbetten.
Jedesmal problematisch sind bei mir hier die GPS-Daten, da das Handy es irgendwie nur selten hinbekommt, diese in die Fotos einzufügen – Mit der „Street View“-App ist das anschließend nicht nur ziemlich umständlich, sondern es ist zudem schwierig, im Nachhinein die korrekte Stelle einer Wanderung in Google Maps wiederzufinden…

Vorteil der „Samsung Gear 360“-Kamera ist, dass man wenig „Brüche“ drinhat, da ja nur 2 Bilder erstellt werden (2×180 Grad). Dennoch habe ich es geschafft, dass auf einigen Bildern sich Geländer leicht versetzt „getroffen haben“ bzw. die Bank im Beispiel 2 auch nicht so ganz stimmt. Aber besser als Geisterbäume, die durch die zahlreichen Einzelbilder bei der reinen „Street View“-Alternative oft entstanden sind…

Beispiel 1 – Römischer Steinbruch bei Bad Dürkheim (Google Maps & Street View)

https://www.google.com/maps/@49.463708,8.158972,0a,82.2y,30.73h,92.09t/data=!3m4!1e1!3m2!1sAF1QipMVO5gdTeZGyppNndTLyc3nN_ekZMNlVWNGZxBc!2e10?source=apiv3

Beispiel 2 – Wanderweg mit Blick auf Grethen / Bad Dürkheim (Google Maps & Street View)

https://www.google.com/maps/@49.4619499,8.15195,0a,82.2y,359.66h,90t/data=!3m4!1e1!3m2!1sAF1QipOTYmZykzAByXASZPhCMTWJCwW_z1JrHTG4ecTH!2e10?source=apiv3

Als Nächstes stünde an, die Video-Funktion der „Samsung Gear 360“ zu testen – Aber an einem Feiertag bei gutem Wetter in der Pfalz war es schon bei Fotos nahezu unmöglich, unfreiwillige Personenaufnahmen in großem Stil zu vermeiden…


How VR works – completed

Today, I completed University of California San Diego’s edX course „How Virtual Reality works“. I have worked on all 6 projects assignments – the last one was a very good one as it combined many things we’ve worked on and offered the possibility to explore and evaluate a current Google Cardboard app on the basis of a criteria catalogue. I picked the Android app „Apollo 15 Moon landing VR“ and didn’t regret my choice.

Below are my notes from the second part of the MOOC – as a reminder for me later on and maybe helpful for others.

  • week 4: Travel and Wayfinding
  • week 5: Menus and Text Input
  • week 6: VR Design Principles

week4 – Travel and Wayfinding

Navigation-components are travel (actual movement, searching a specific target, maneuvering or exploring the environment) and wayfinding (this is the cognitive component).

In VR, travel is a designer decision (teleport, active or passive role,…); the steps are choosing a destination and choosing the travel technique (among them physical locomotion, steering a vehicle, instantaneous travel). Physical locomotion techniques are intuitive, but limited to space and human physics – because of their high level of immersion the entertainment industry (The VOID, modal VR via backpacks, treadmills) and phobia treatment make use of them. Steering techniques via physical devices can cause motion sickness whereas target based techniques (point to location and user is moved there – markers on the floor or use of maps) are not intuitive and might be disorienting.

Wayfinding means defining a path from a to b: there is spatial knowledge (exocentric knowledge – location of user irrelevant, typically it is map-based knowledge) and there are visual cues (egocentric wayfinding cues)
To make wayfinding tasks easier, the environment design can include natural environment features (characteristic mountains etc.) and architectural objects.
The most important wayfinding aids are landmarks (tall structures or buildings which can be seen from far away, man-made or natural like rivers or mountains), signs and maps. Landmarks also can be local and help users as visual clues where to take a turn. Signs with their single purpose of wayfinding aids can look like in the real world (attached to a post), like directional arrows to indicate a destination or user specific as labels placed directly for finding an entrance etc. In VR, maps can be shown at varying levels of resolution or zoom, for orientation the approaches are north pointing up or forward/track up.
Disadvantages in VR wayfinding are the limited resolution of the screen (therefore text is hard to read) and limited field of view (typical HMDs only have 90-100 degrees).

week 5 – Menus and Text Input

VR-Interactions like selection, manipulation and navigation are mappings of real-world-things, but the interaction types „menus“ and „text input“ are more abstract.

In VR we should always try to use direct interaction with the objects of our environment (no slider to change size but grab object and pull). Menus are very often done as easy-to-learn 2D flat menus (vertically and oriented towards the user), they are placed in the environment (physical room the user is in = Oculus Home etc.), in user space (on his arm,…) or in object space (to resize, delete, move object). 3D menus would be more natural (maybe as cubic menus arranged around an object), but 3D menu items may be occluded or outside users view.

There are different kind of interfaces and input options for VR: tangible interfaces (mostly consist of physical objects with sensors like flight simulators, special control panels,…), gesture control interfaces (MS Kinect, Leap Motion,…  disadvantage: learning gesture commands and practicing them), voice commands (there are already systems like Amazon Echo, Google Home, Apple Siri, MS Cortana which are designed to recognize natural human speech – with the right software they could control a VR application). Text input in VR is difficult, but occasionally there is a need for that (security passwords, saving things per filename, numbers in 3D design and modeling apps, labels in engineering apps,…) – Virtual keyboards are an active research area.

week 6 – VR Design Principles

Feedback: A user should get feedback after interactions in VR systems to his visual sense, auditory sense and haptic sense (the more senses the better). If the VR hardware has no haptic output, substitution can help, e.g. show visually what can’t be felt.
Temporal compliance (head motion complies with image updates) is important, therefore latency (delays after input, when rendering an image) should be at a minimum – to avoid image jutter, the programmer can reduce the amount of data that’s displayed (less complex 3D models).
Spatial compliance (when a user moves an object, his finger motions need to comply with the position of the controller and its effect on the VR environment – dials instead of sliders are recommended) and nulling compliance (going back to original position and original value) are also important.

Constraints: Artificial Constraints should be used to increase the usability of VR apps (limit DOFs / use physics engines like NVIDIA’s PhysX SDK in Unity to make apps compliant with law of physics / use dynamic alignment tools like user input to grid or limit values).

Human factors: It is important to think about the VR target audience: their previous VR experience (to avoid feeling overwhelmed or getting motion sick), age (maybe limited vision – adjust use of text), height (when moving things physically), VR hardware (are 1 or 2 hand controllers necessary? often, one controller is to hold an object which you manipulate with the other one) etc.

Isomorphic or non-isomorphic approaches: Whereas isomorphic approaches for VR application designs are based on real world and used for simulation apps (testing cars with VR wheel etc.), with non-isomorphic approaches for VR application design we can overcome human limitations and laws of physics limitations („magic“). N.i. approaches often borrow ideas from literature and film, are enjoyable und easy to understand when based on well-known ideas – on the other hand they are difficult to create because of people’s expectations.

VR system evaluation needs planning and statistical analysis – the best way is to test on target users under controlled conditions. Tests of functionality would include: frame rate through all parts of virtual world (today >=90fps for high-end HMD) / latency&lag (could cause motion sickness) / test for network latency if it can impact latency of app’s rendering engine / test for user comfort (motion sickness, how well HMD fits the head, how app is used)

What could be future aspects of VR?
Whereas today’s VR apps can be quickly written with VR authoring tools (Unity 3D, Unreal Engine, Amazon Lumberyard – disadvantage: locked in to provider) with powerful built-in functions, in future, VR development might directly happen in VR. There will be massive changes in Audio for VR (audio not yet implemented in tools, just visual). Thermal issues with mobile VR based on smartphones might be solved. Maybe there will be „inside-out-tracking“ from the HMD (built-in sensors in HMD). Future tech specs (today devices render 1200×1080 pixel, 15 pix per degree across a 90 degree field of view with fixed focal distance) might offer a new level of feeling presence in VR. There are indications that VR and AR are going to merge. There are high revenue predictions for VR (among them half is software development for apps, games, theme park solutions) and AR.

Today, I also decided to upgrade to the verified track in order to get the course certificate for „How Virtual Reality works“: paying with credit card was easy but it remains to be seen if my (not so good) webcam photo in combination with the (not so good) webcam-photo of an ID (I tried my driver’s license) fits the requirements …

Back to my blog post: How VR works (week 1 – 3)

(Update July 2, 2017)
Verification worked, that’s my verified course certificate of achievement:
https://courses.edx.org/certificates/31ee6ce5b22646808710b0d00385b435